Lisp Badge
The Lisp Badge is a self-contained computer with its own display and keyboard, based on an ATmega1284, that you can program in uLisp:
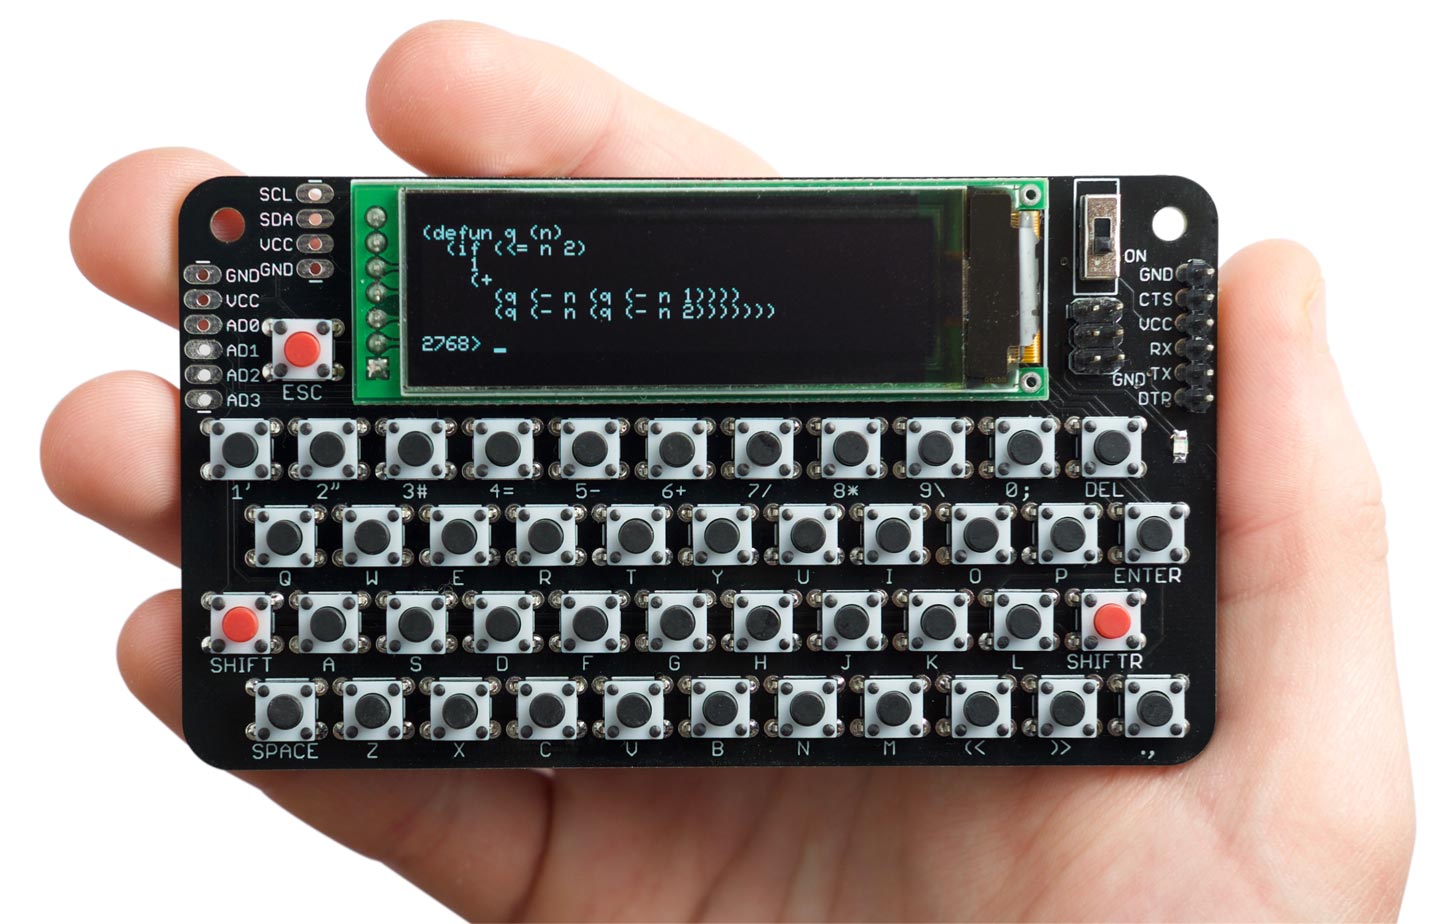
You can use it to run programs that interface to components such as LEDs and push-buttons via the I/O pins, read the analogue inputs, and operate external devices via the I2C and SPI interfaces. It has a greyscale OLED display that gives 8 lines of 42 characters, and an integrated 45-key keyboard optimised for Lisp.
For details of how to build one see Lisp Badge on Technoblogy.
Get the latest firmware from Lisp Badge on GitHub.
Updates
10th July 2020: The Lisp Badge firmware has now been updated to Version 3, which adds the following improvements: uLisp is now updated to uLisp AVR Version 3.3a; three additional plotting extensions have been added, fill-screen, plot-pixel, and glyph-pixel; the keyboard now supports entering three additional characters needed by Lisp; and the piezo speaker can now be used with the note function to play tunes. These improvements are described in greater detail below.
23rd January 2022: The Lisp Badge firmware has now been updated to Version 4.1a. This adds a register function that allows you to read the values of 8-bit peripheral registers, or write values to the registers. It allows you to control the peripherals in the processor from a Lisp program, or interactively experiment with the peripherals by giving commands at the uLisp prompt; see the examples below.
22nd September 2022: The Lisp Badge firmware is now at Version 4.3, which adds support for arrays, and built-in documentation.
Specification
Size: 107mm x 61mm (4.2" x 2.4").
Display: 42 characters x 8 lines, or 256 x 64 pixels.
Keyboard: Integrated 45-key keyboard providing upper and lower-case characters, digits, and the symbols required by uLisp. Three additional characters can be entered using SHIFT: '~' (SHIFT-ESC), '%' (SHIFT-DEL), and ':' (SHIFT-Enter).
Memory available: 2816 Lisp objects (11264 bytes).
EEPROM: 1024 Lisp objects (4096 bytes), allows you to save the Lisp workspace using save-image.
Processor: ATmega1284P
Clock speed: 16 MHz.
Current consumption: Approx. 20 mA.
Language
uLisp, a subset of Common Lisp, with 155 Lisp functions and special forms. For a full definition see uLisp Language Reference.
The language includes four graphics extensions: fill-screen for clearing the screen, plot-pixel for plotting pixels, and plot and plot3d, for plotting graphs and 3d functions. For more information see Plotting extensions below.
Types supported: list, symbol, integer, character, string, and stream.
An integer is a sequence of digits, optionally prefixed with "+" or "-". Integers can be between -32768 and 32767. You can enter numbers in hexadecimal, octal, or binary with the notations #x2A, #o52, or #b101010, all of which represent 42.
User-defined symbol names can have arbitrary names. Any sequence that isn't an integer can be used as a symbol; so, for example, 12a is a valid symbol.
There is one namespace for functions and variables; in other words, you cannot use the same name for a function and a variable.
Includes a mark and sweep garbage collector. Garbage collection takes 5 msec.
Interfaces
These interfaces are brought to headers at the edge of the Lisp Badge board. The numbers in brackets refer to Arduino pin numbers:
- Four analogue input pins using analogread: A0 to A3 (24 to 27) plus VCC and GND.
- Two analogue outputs using analogwrite: MISO (6), and SCK (7).
- Digital input and output using pinmode, digitalread, and digitalwrite: MOSI (5), MISO (6), SCK (7), RX0 (8), TX0 (9), SCL (16), SDA (17), and A0 to A3 (24 to 27)
- I2C interface using with-i2c and restart-i2c: SCL (16) and SDA (17).
- SPI interface using with-spi: MOSI (5), MISO (6), and SCK (7).
- Serial interface (FTDI) using with-serial: RX0 (8) and TX0 (9).
The shift key can be used as a digital input: SHIFT (23).
SCK (7) is connected to an LED on the front panel. This is an analogue output pin, so you can vary the brightness of the LED.
A piezo speaker is connected to pin 4. It is used for the #\Bell character, and can be used to play tunes with the uLisp note function.
Playing tunes
The uLisp note functions can now be used to play tunes on the Lisp Badge piezo speaker, which is on pin 4. For example, the following function scale plays the scale of C:
(defun scale ()
  (mapc
   (lambda (n) (note 4 n 4) (delay 500))
   '(0 2 4 5 7 9 11 12))
  (note))
Thanks to Thomas Fitzsimmons for developing the modifications to the Lisp Badge that enable note to work correctly.
Plotting extensions
The Lisp Badge contains the following five plotting extensions, designed to allow plotting to the greyscale graphics display.
After generating a plot, plot and plot3d wait for the ESC key to be pressed before displaying the uLisp prompt.
fill-screen function
Syntax: (fill-screen [pixel])
Clears the screen to black, or fills it with a specified pixel value.
For example, the following command fills the screen with 50% grey:
(fill-screen #x77)
plot-pixel function
Syntax: (plot-pixel x y [pixel])
Plots a pixel to the specified x,y coordinates, where x should be 0 to 127 and y should be 0 to 63.
Because of the way that the display memory is mapped to the display, plot-pixel plots two adjacent pixels with an x resolution of 128. The third parameter pixel specified the colours of the two pixels; if omitted it defaults to #xFF which gives two adjacent white pixels.
For example, to plot a 2x1 white pixel to the top right-hand corner of the screen give the command:
(plot-pixel 127 63)
To plot a 1x1 grey pixel to the top right-hand corner of the screen give the command:
(plot-pixel 127 63 #x07)
glyph-pixel function
Syntax: (glyph-pixel char x y)
Returns the pixel value from the 6x8 bitmap for character char, where x can be from 0 to 5 and y can be from 0 to 7.
For example, the following function prints a character pixel by pixel:
(defun test (ch)
  (dotimes (y 8)
    (dotimes (x 6)
      (princ (if (= (glyph-pixel ch x (- 7 y)) 15) #\* #\space)))
    (terpri)))
Trying it out:
> (test #\R)
****
*   *
*   *
****
* *
*  *
*   *
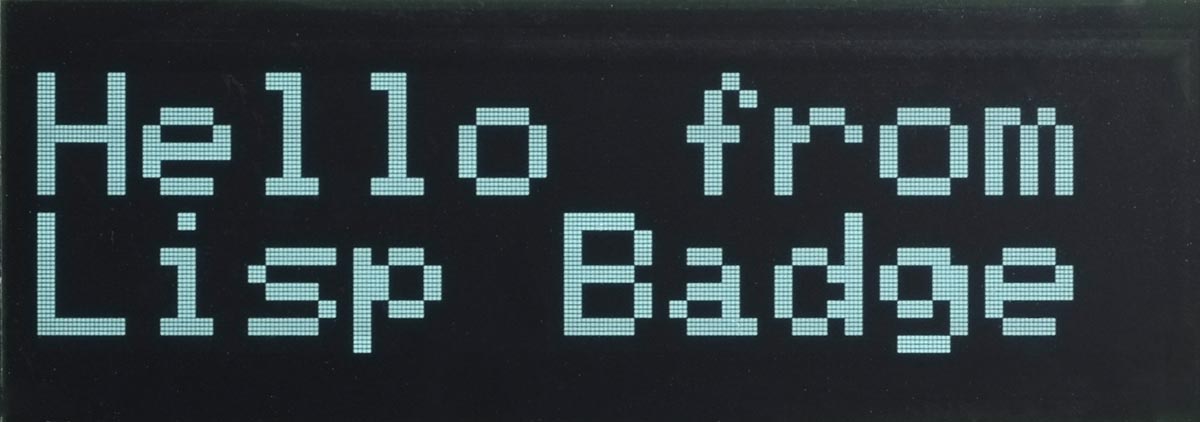
The glyph-pixel function lets you plot giant characters on the display. For example, the following demo uses glyph-pixel and plot3d to display a banner in characters four times the normal size:
(defun message (x y)
  (let* ((text "Hello from Lisp Badge ")
         (c (+ (truncate x 24) (* 11 (truncate (- 63 y) 32))))
         (ch (char text c))
         (px (mod (truncate x 4) 6))
         (py (mod (truncate (- 63 y) 4) 8)))
    (glyph-pixel ch px (- 7 py))))
Entering:
(plot3d message)
will plot:
plot function
Syntax: (plot [x-intercept y-intercept] [function]...)
Plots up to four functions on the same graph, optionally with axes.
Each function should be a function of one parameter, the x coordinate, and it will be called with each value of x from 0 to 255. The function should return the y value, from 0 to 63.
If x-intercept and y-intercept are specified, plot3d draws axes through those intercepts.
For example, defining:
(defun sine ()
  (let ((x 0) (y 2045))
    (lambda (n)
      n
      (incf x (/ (* y 16) 163))
      (decf y (/ (* x 16) 163))
    (+ 32 (ash x -6)))))
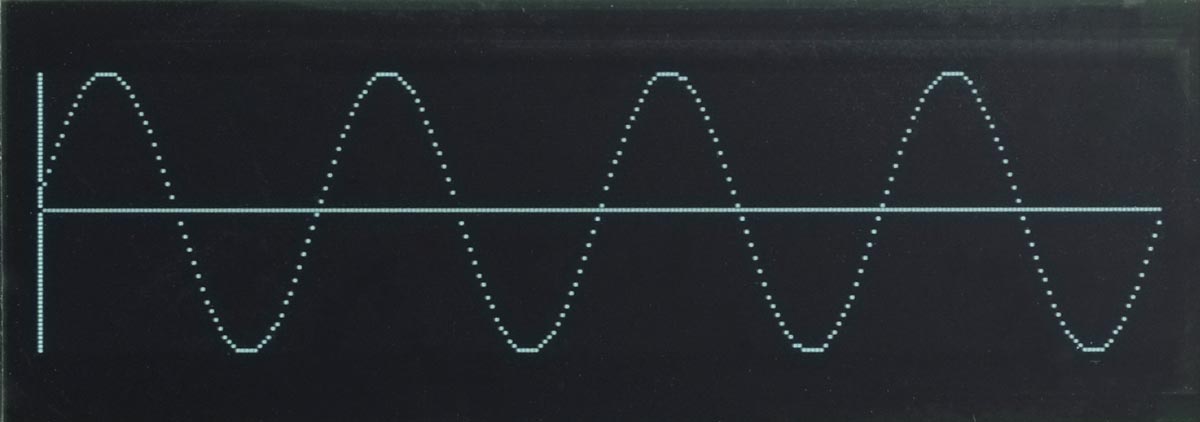
the following command:
(plot 0 32 (sine))
will plot:
Plotting multiple functions
The following example plots the voltages on the analogue inputs 0 to 3 once a second on a single plot. First define:
(defun adc (n) (lambda (x) (delay 250) (/ (analogread n) 8)))
Then give the command:
(plot 0 0 (adc 0) (adc 1) (adc 2) (adc 3))
plot3d function
Syntax: (plot3d [x-intercept y-intercept] [function])
The function should be a function of two parameters, the x and y coordinates, and it will be called with each value of x from 0 to 255 and y from 0 to 63. The function should return the greyscale value to be plotted, from 0 to 15.
If x-intercept and y-intercept are specified, plot3d draws axes through those intercepts.
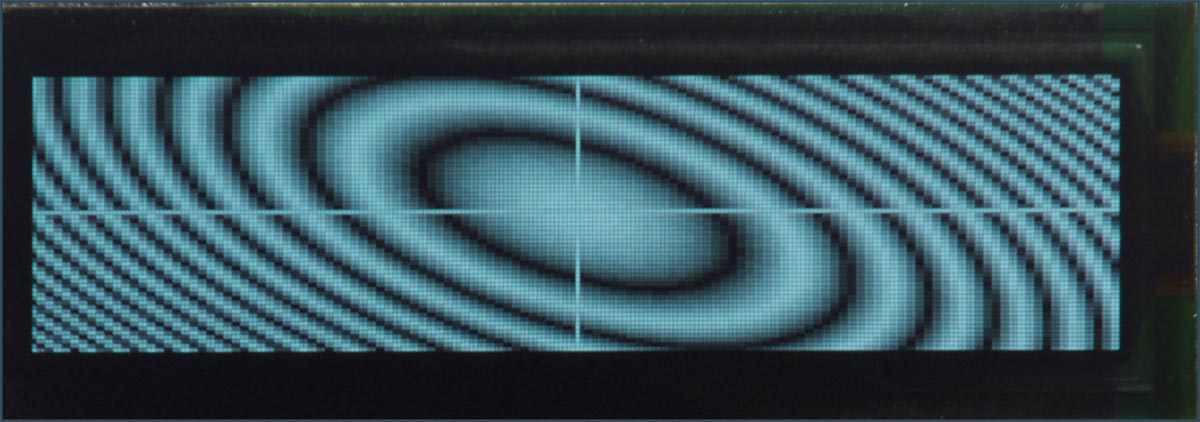
For example, defining:
(defun p (x y)
  (let ((a (/ (- x 128) 2))
        (b (- y 32)))
    (min (abs (- (logand (/ (+ (* a a) (* b b) (* a b)) 16) 31) 15)) 15)))
the following command:
(plot3d 128 32 p)
will plot:
Programming peripheral registers
The Version 4.1a of uLisp includes a register function that allows you to read the values of 8-bit peripheral registers, or write values to the registers. It allows you to control the peripherals in the processor from a Lisp program, or interactively experiment with the peripherals by giving commands at the uLisp prompt.
Here are some examples of its use on the Lisp badge.
Blinking an LED
For the first example we will blink the built-in LED on the Arduino Uno board by directly accessing the port it's connected to, without using the usual pinmode and digitalwrite functions.
The LED on the Lisp Badge is connected to bit 7 in port B, so the code is as follows:
(defun blink ()
  (let ((led (ash 1 7)))
    (register :ddrb (logior (register :ddrb) led))
    (loop
     (register :portb (logior (register :portb) led))
     (delay 1000)
     (register :portb (logand (register :portb) (lognot led)))
     (delay 1000))))
Run it by typing:
(blink)
Exit from the program by entering ~.
Controlling a timer
The next example programs a timer to flash an LED once a second. We will use the ATmega1284P Timer/Counter3, which fortuitously can generate waveforms on the I/O pin connected to the Lisp Badge LED. The example is essentially the same as the one described here in Programming AVR registers, except using Timer/Counter3 rather than Timer/Counter1.
Here's the code for the Lisp Badge:
(defvar *tccr3a* #x90)
(defvar *tccr3b* #x91)
(defvar *ocr3al* #x98)
(defvar *ocr3ah* #x99)
(defvar *divisor* 15624)

(defun timer ()
  (register :ddrb (logior (register :ddrb) #b10000000))
  (register *tccr3a* #b00010000)
  (register *tccr3b* #b00001101)
  (register *ocr3ah* (ash *divisor* -8))
  (register *ocr3al* (logand *divisor* #xff)))
Program the timer by typing:
(timer)
Unlike in the previous blink example, the LED will continue flashing independently of what your Lisp program is doing until you reset the processor.
The register function allows you to interactively experiment with the peripherals by giving commands at the uLisp prompt. For example, try the effect of changing the Timer/Counter1 prescaler to 256 with:
(register *tccr3b* #b00001100)
To turn off the LED evaluate:
(register *tccr3a* 0)